A session in CourseMill is a unique instance of a course which defines the location, date and time. As an administrator, you define the rules of the session and grant permissions to the instructors who can manage the session.
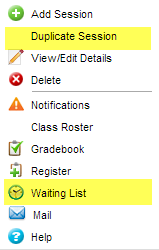
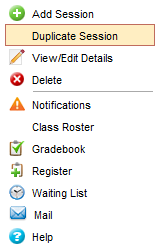
The menu bar on the Session provides the following tasks:
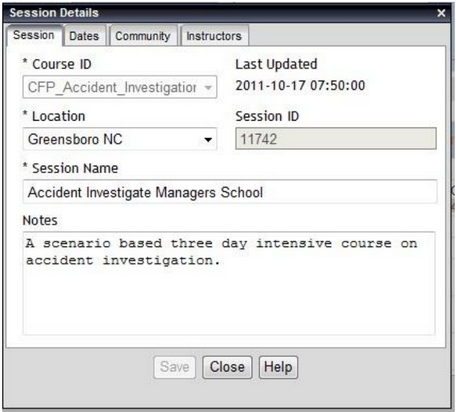
| Add Session | Opens the session Details window to build the scope of the session’s functionality. | ||
| View/Edit Details | Opens the session Detail for viewing and editing of an existing session. | ||
| Delete |
Deletes a session.
|
||
| Notifications | Provides the ability to turn on/off pre-set, customizable notifications regarding the workflow for a session. These notifications will be sent to the student using the email system that was selected for the session, from the instructor’s email address. If there is no instructor, the email will come from the system administration email address. | ||
| Call Roster | Provides a listing of the students in the course session. | ||
| Gradebook | Provides the ability to change scores, status, and dates. | ||
| Register | Allows instructors/reporters (who have been given permission) to register students or organizational groups in the session. | ||
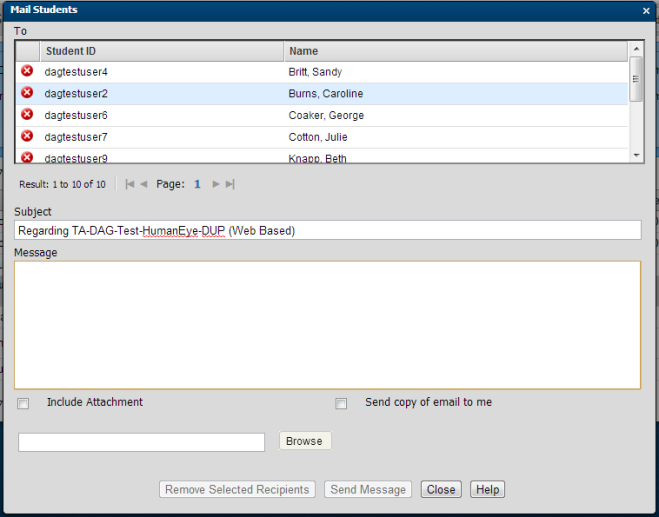
| A messaging system between session instructors and students. Based on CourseMill configuration, it allows email attachments. | |||
| Help | Provides access to the Help documentation. |
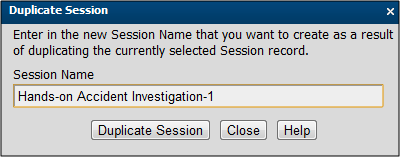
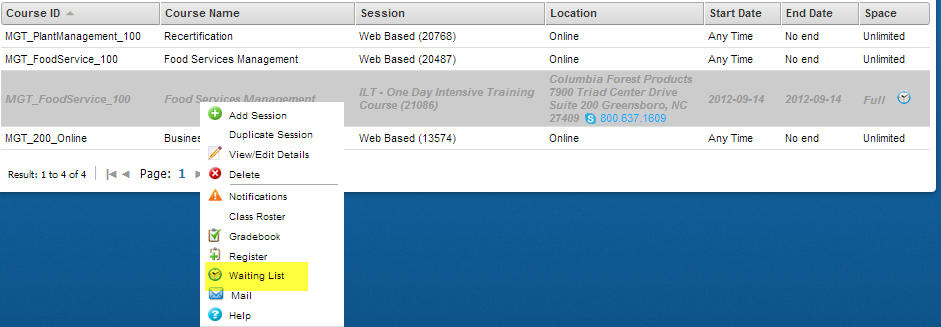
There are two more functions which can only be accessed by right-clicking on a course session from the list. They are Duplicate Session and Waiting List which are explained at the end of this document.

The Search area at the top of the dialog provides the ability to easily find sessions when the list of sessions becomes too large. Use the controls as follows:
| Org ID | Org ID under which the session is registered. |
| Course ID |
Enter any combination of letters/numbers to search for any sessions that contain that combination in the Course ID. For example, if you have two courses, one with an ID of “Accounting” and the other with an ID of “FingerPaint”, your search for “ing” will display sessions for both courses. |
| Course Name | Enter any combination of letters/numbers to search for any courses that contain that combination in the title. For example, if you have two courses, one with a title of “Accounting 101” and the other with a title of “Biology 101” your search for “101” will display sessions for both courses. |
| Location |
Select from a list of all locations defined in the organization. |
| Show | Filter your view by displaying one of three states of sessions (All, Open, or Closed). If you choose ALL, any past/expired sessions will display in gray . |
| Session Name | Enter any combination of letters/numbers to search for sessions that contain that combination in the session name. For example, if you are looking for all online courses, search for "Web based". |
The session is unique to a site by Session ID. The Session ID can be sorted on in numerous catalogs and reports. A management naming convention should be devised to allow the courses to sort as desired on My Courses or the Course Catalog. For example, you might want to have city name first or state name first based on where your physical locations reside.
Any administrator, instructor or reporter, who has been given the permission, can add sessions. To add a session to your organization, select Manage Sessions on the left navigation bar, then click the Add Session button.
|
|
|
|
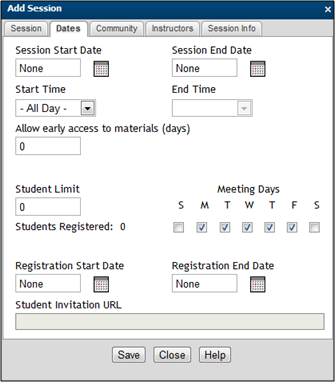
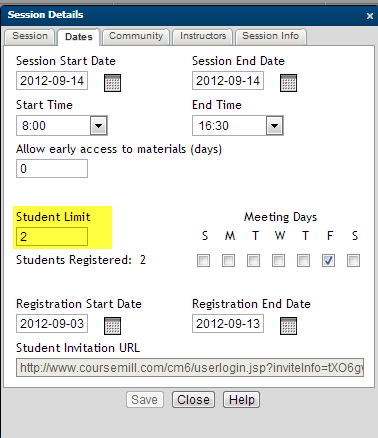
Meeting Days - Check the boxes for the specific days of the week the session will run. This is only used for displaying on the student calendar. If you have a session that has a start date of 8/1 and an end date of 8/31 but your class only runs on Mondays, for example, you will need to check only the Monday box in the session record, otherwise it will show on the calendar for all the days you have checked. When you add a session, the default will leave all check boxes blank so be sure to set them correctly.
Registration Start Date and Registration End Date allows you to set registration/enrollment time periods. Even though this course is set for the future, you may want to allow students to register ahead of time.
Student Invitation URL – This Web address is automatically generated and can be used to copy and paste in an email if you wish to send out invites to students to take the session. This URL will take them directly to the CourseMill logon screen to allow them to log in, and then will direct them to the catalog to enroll in the session. It does this by placing the Course ID in the Catalog ID search field to only display that course when displaying the course catalog.

|
|
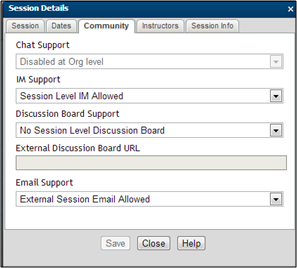
|
This restricts communication using the specific community feature to only those users registered in the session.
|
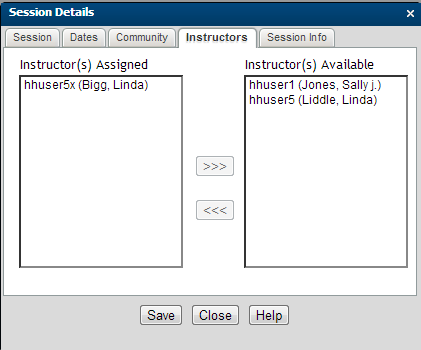
|
|
|
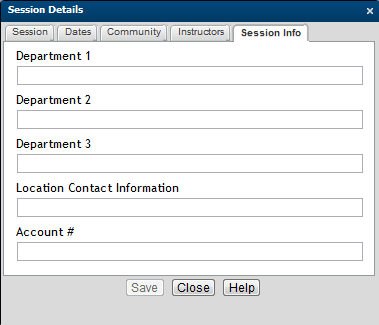
This tab will only display if the administrator has set up categories for sessions in the Manage Org area.
|
There are several types of course/session notifications.
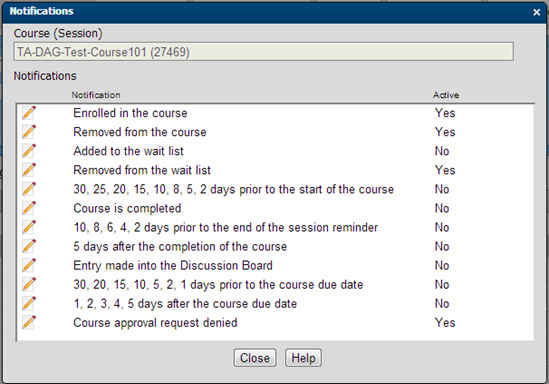
To modify the contents of each notification click the pencil icon.
Each notification contains sample content. This can be customized to your preference.
The notifications that have numbers in the title are what we call Scheduled notifications and can be defined with a managed property. The administrator is the only one that can set this up. You can define any number of days for each notification. The first example to the left is saying that a reminder should be sent 30 days prior to the start of the course, then also 25 days, 20 days, 15 days, and so on..

Variables are field names that can be pulled from the database to personalize messages. They appear in < > as shown.
Select Help to view a complete list of available content variables and their exact spelling.
|
|
If turned on, seven of the 12 notifications are sent immediately upon the corresponding action. For example, when a student is enrolled in a course the corresponding notification is sent immediately. This is true if the instructor/administrator performs the enrollment, or the user self-enrolls. This is also true if existing users are auto-enrolled as well as future students that will match the auto-enrollment rules. However, the other five notifications are scheduled for distribution by setting up a managed property telling CourseMill when to send the notification. They are actually sent during the nightly Notification Maintenance run (Admin Tasks:> Manage Scheduled Tasks> Notification Schedule). These five are shown below with their corresponding managed property that the administrator will need to set up. |
| Notification |
Managed Property |
|---|---|
| Nn,nn,nn,nn prior to the start of the course |
CourseNotificationDays – specifies the nn values |
| Nn,nn,nn,nn prior to end of session reminder |
SessionEndWarningDays - specifies the nn values |
| Nn days after completion of the course |
SessionFollowUpDays - specifies the nn values |
| Nn,nn,nn,nn prior to the course due date |
DueDateApproachingDays - specifies the nn values |
|
DueDateWarningThresholdDays – specifies the number of days prior to the due date that the Yellow/Red visuals show up in the My Courses area |
|
| Nn,nn,nn,nn after the course due date |
DueDatePassedDays - specifies the nn values |
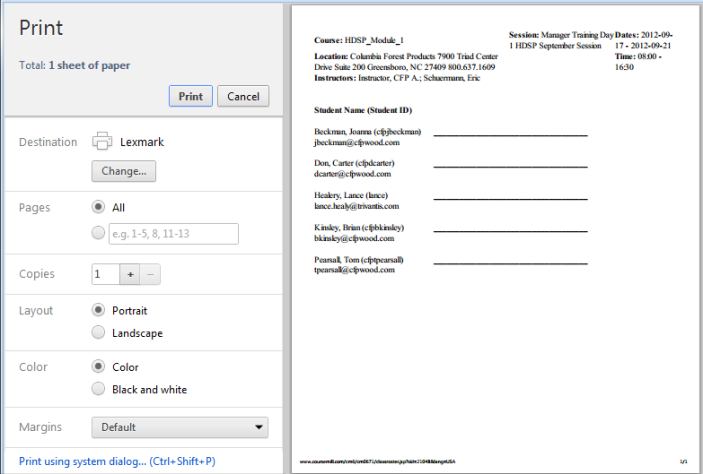
When you select Class Roster, the roster report will automatically generate. You can print it if necessary.
All students registered in the course will display in the Gradebook. You can narrow the list down by using the Filter button.
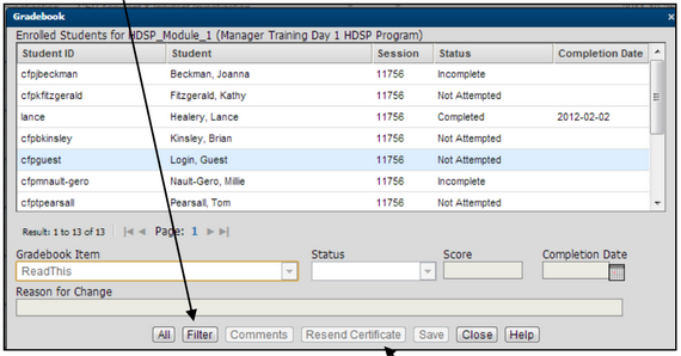
Click on the student you wish to grade.
Select the Gradebook Item.
Select the Status from the drop down.
Enter the Score value.
Select the Completion Date from the calendar icon.
Enter the Reason for Change to the Gradebook if you want. The student will see this on their transcript.
If a course has been completed and a certificate is available, select Resend Certificateto allow an instructor to email that certificate notification to the student.
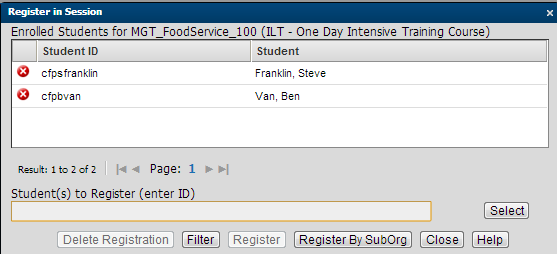
Anyone who has permission to register students can do so here. Initially, this will display the students already registered in the session.
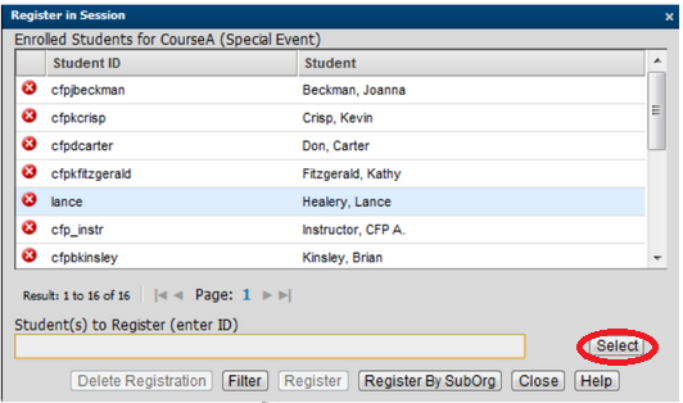
Use the controls on this dialog as follows:
The Select button opens a window to allow the selection of additional students.
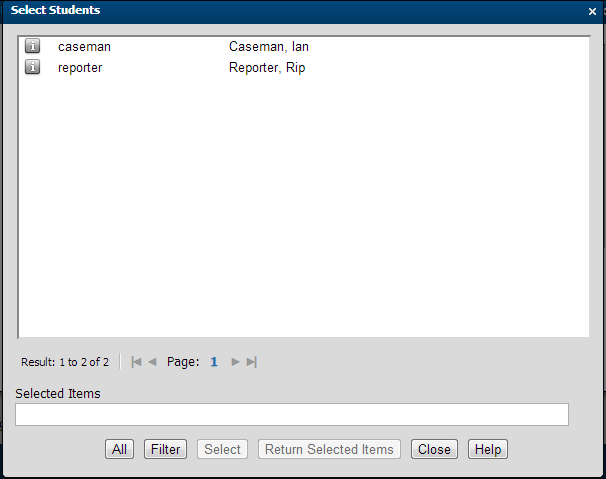
Select the students you want to register. (Use Ctrl/Shift to select multiple users.)
|
|
Use the  to remove users from the list. This action will unregister the student but will
also remove all the history for this session. Use this with caution as the records
cannot be recovered. to remove users from the list. This action will unregister the student but will
also remove all the history for this session. Use this with caution as the records
cannot be recovered. |
The Register By SubOrg button will open a window to create parameters to filter users by SubOrg values.
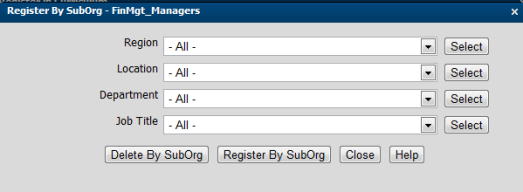
When registering by SubOrg, select one or more values for each Sub-Org and then select Register by Sub-Org or Delete by SubOrg.
Delete by SubOrg will delete that group of students and essentially un-register them.
The Filter button will allow you to drill down even further by selecting a particular user by entering in one of four fields or any of the SubOrgs. For instance, you might want to find those with the first name of George. This feature helps you find people more quickly.
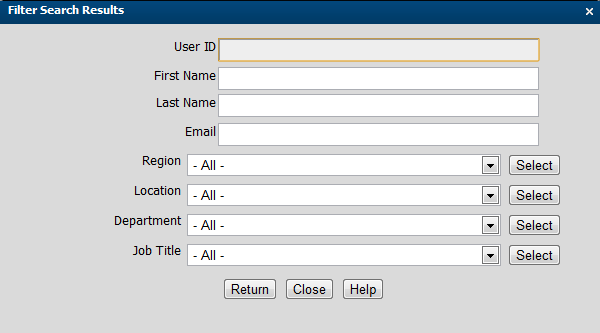
When selecting the SubOrgs, you can select one or many values in each category.
|
|
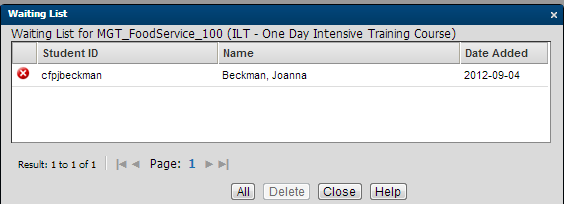
Waiting lists are created when a student registers for a class and there are no more available seats in the class.
If there are more students registered for a class than what the class size limits, then the administrator or instructor will see a Waiting List icon to the right of the session.
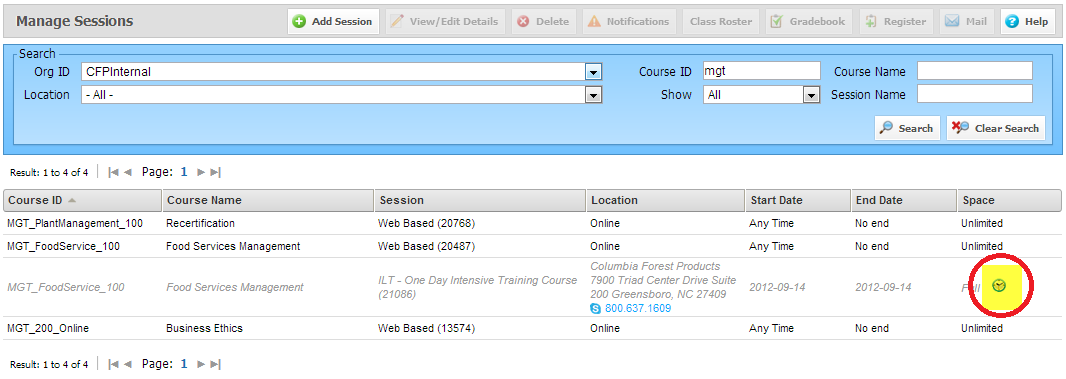
If you select the session that you have a waiting list for, you may right click to open up the Waiting List for the session (as shown below)…...
Upon clicking, the following screen will display all the students on the waiting list in date order. This screen allows you ONLY to delete the people off the wait list. This function REMOVES them from the waitlist but does NOT enroll them in class. he student will receive the Removed From Waitlist notification, if that notification is activated.
There are two other ways to manage your Wait list:
If the instructor/admin goes back to the session and increases the student limit, the next person in line on the waiting list will automatically be enrolled in the class. Be sure to have your enrollment notifications turned on, so the student will be notified that they are now off the wait list, but enrolled in the session.
The instructor can simply click on the Register tab and register the student in the class. If an instructor/admin registers a student, they are allowed to go over the class limit with no ramifications.
|
|
|
|
Access using Right-Mouse Click
|
Select the Help button from within each topic of the session for context-sensitive information.
Support | About ELB Learning
© ELB Learning 2022