A CourseMill curriculum is built by combining one or more active courses. Each Curriculum ID is unique to the organization and can be assigned to individual students or to groups of students in a Sub-Org. As an administrator, you define the rules of the curriculum and grant permissions to the instructors/reporters who can manage the curriculum and its content.
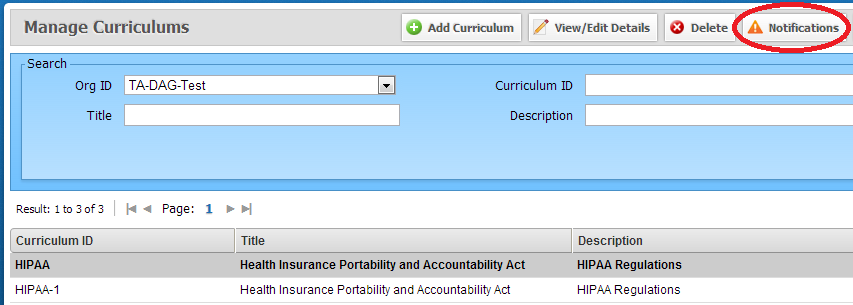
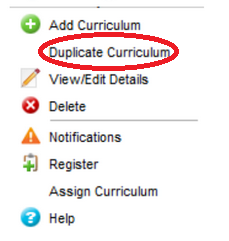
The Manage Curriculum menu ribbon provides the following options:
| Add Curriculum | Opens the Curriculum Details window to build the scope of the curriculum’s functionality. | ||
| View/Edit Details | Opens the Curriculum Detail for viewing and editing of an existing curriculum. | ||
| Delete |
Deletes a curriculum.
|
||
| Notifications | Provides the ability to turn on/off pre-set, customizable notifications regarding the workflow for a curriculum. These notifications will be sent to the student using the email system that was selected for the organization from the system administration email address. | ||
| Register | Allows instructors/reporters (who have been given permission) to register students or organizational groups in the curriculum. | ||
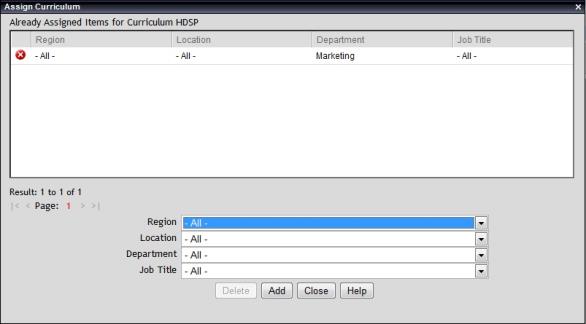
| Assign Curriculum |
Permits re-occurring assignment of curriculum to entire organizational groups as they are created within CourseMill. For example, you may want to assign all users in the ACCTG sub-org to the Accounting_Adv curriculum . Any new user that is added and defined in that sub-org will automatically become enrolled which will display the courses in the curriculum in their My Courses tab on the student interface.
|
||
| Help | Provides access to the Help documentation. |
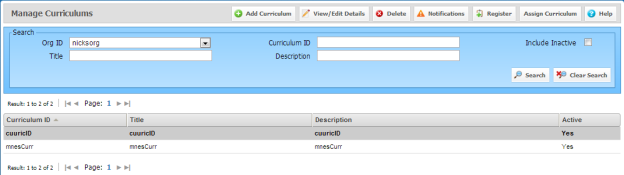
The Search area at the top of the screen provides the ability to easily find curriculums when the list of curriculums becomes too large. Use the following fields to filter your search:
| Org ID | Org ID under which the curriculum is registered. |
| Curriculum ID |
Enter any combination of letters/numbers to search for any curriculum that contain that combination in the Curriculum ID. For example, if you have two curriculums, one with an ID of “Accounting” and the other with an ID of “FingerPaint”, your search for “ing” will display both curriculums. |
| Title | Enter any combination of letters/numbers to search for any curriculums that contain that combination in the title. For example, if you have two curriculums, one with a title of “Accounting 101” and the other with a title of “Biology 101” your search for “101” will display both curriculums. |
| Description |
Enter any combination of letters/numbers to search for any curriculums that contain that combination in the description. For example, if there are two curriculums, one with a description of “Accounting basics to get you started” and the other with a description of “Biology basics to get you started” your search for “started” will display both curriculums. |
| Include Inactive | Enable this check box to expand your list to include not only the active curriculums, but also the inactive ones (those without a check mark in the Active check box. For more information, see "Adding a Curriculum" below. |
The curriculum is unique to an organization by Curriculum ID. The Curriculum ID can be sorted on in numerous catalogs and reports. A management naming convention should be devised to allow the Curriculums to sort as desired on My Courses or the Course Catalog. For example, ‘ACCT_1001’ would sort all Accounting curriculums by the prefix ‘ACCT’.
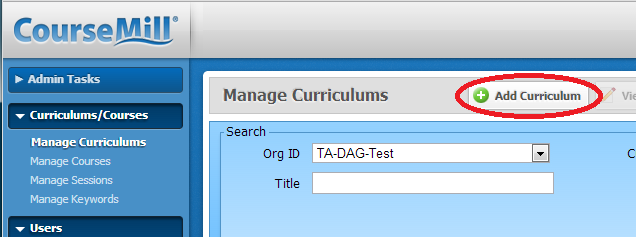
Any administrator, instructor or reporter, who has been given the permission, can add curriculums. To add a curriculum to your organization, select Manage Curriculums on the left navigation bar, then click the Add Curriculum button.
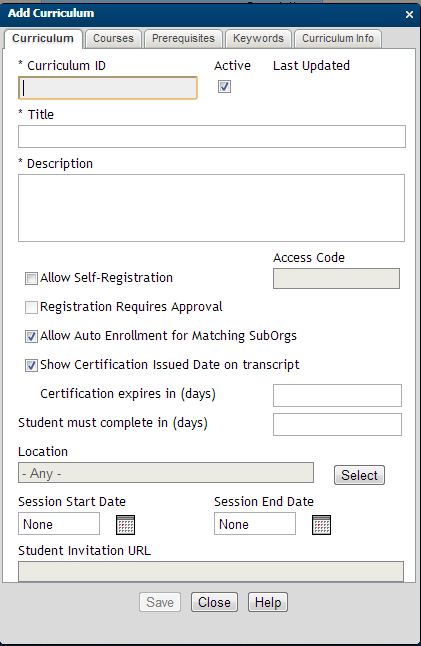
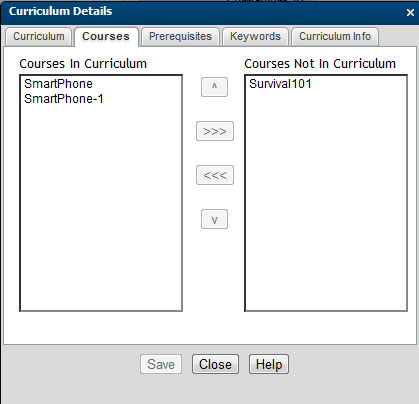
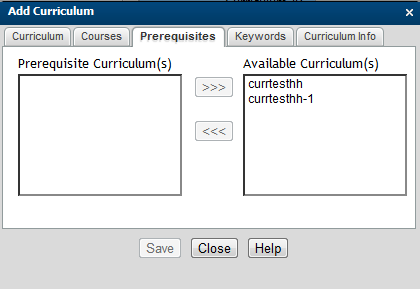
Complete the curriculum information shown below to define your curriculum:
|
|
Show Certificate Issued Date on Transcript tells CourseMill that this is a certification program and when the student completes this curriculum, the completion date will be printed next to the heading Certification Issued. The screen capture below is an administrator's view of the student transcript.
![]()
Certificate expires in (days) specifies how long the certification is good for (for example. 365 days). You may also set up a corresponding notification that alerts the student a certain number of days before their certification expires. (See Notification below.)
Student must complete in (days) forces a time period to complete the curriculum. Once enrolled in the curriculum, the student has this number of days to complete it or it will expire and show as such in the student interface. If it expires, the student will no longer have access to launch it. A corresponding notification can also be set up that alerts the student a certain number of days before their curriculum expires. (See Notification below.)
Location - If your entire curriculum is held (or started) at a physical location, click Select for a drop-down list of all your available locations (previously defined by your administrator).
Session Start Date and Session End Date – Using the calendar icon, select the dates if you are setting up a particular time period for the curriculum. For specific times of the day, the courses within the curriculum would carry those times.

|
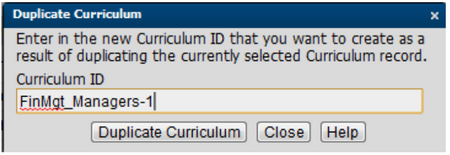
If your curriculum has multiple locations or dates, you will need to duplicate your curriculum to accommodate those other locations/dates. |
Student Invitation URL – This URL is automatically generated and can be copied into an email if you wish to send out invites to students to take the curriculum. This URL will take them directly to the CourseMill Logon screen to enter log in credentials, and then will direct them to the catalog to enroll in the curriculum.
|
|
|
|
|
|
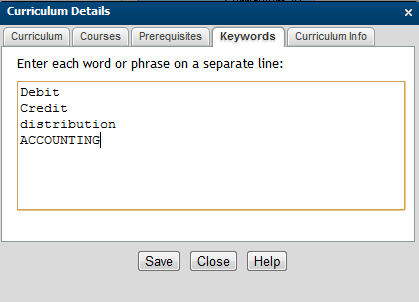
Course or Curriculum keyword comparison tracking is available through Manage Keywords under Courses/Curriculums.
|
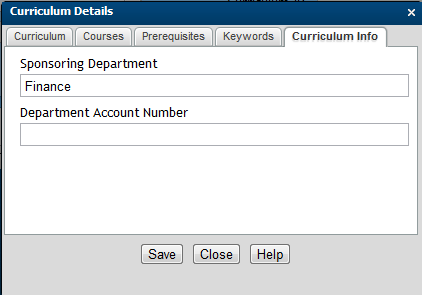
The Curriculum Info tab will only display if the administrator has set up user-defined fields for curriculums in the Manage Org area. The user-defined fields set up for curriculums will display here (for example: type of curriculum, owner) so values can be filled in for this particular curriculum. Up to eight user-defined fields can be created at the Organization level. This example only shows two. This data is not shown on any reports unless you choose to build a custom report.
|
From Manage Curriculum, highlight the curriculum and click the Notifications button.
This will bring up the Notifications dialog and will display all the curriculum notifications available.
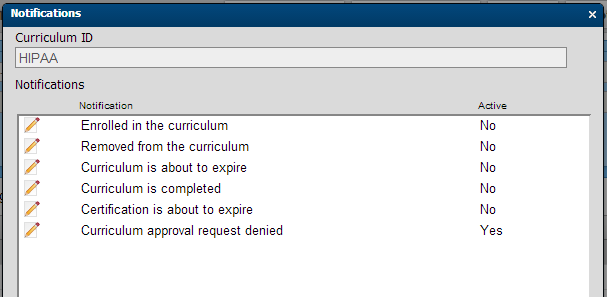
To view or modify the contents of each notification, click the pencil icon next to the notification. This will bring up the notification for editing if needed. To activate a notification, be sure to check the Active check box.
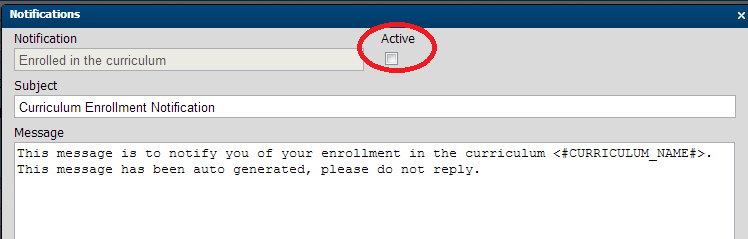
Each notification contains sample content and can be customized to your preference. Variables, such as <#CURRICULUM_NAME#> in the above example, are field names that can be pulled from the database to personalize a message.
Click the Help button to view a complete list of available content variables and their exact spelling.
|
|
|

|
If the typical user does not have an email, use the manager’s email in the email address field in the user profile to alert or distribute the messages through the employee's supervisor. |
If turned on, four of the six notifications are sent immediately upon the corresponding action. For example, when a student is enrolled in a curriculum (either by the Instructor/Administrator, by self-enrolling, or by Auto Assignment – for current users or future users matching the enrollment rules) the corresponding notification is sent immediately.
However, the other two notifications are scheduled for distribution by setting up a managed property directing CourseMill when to send the notification. They are physically sent during the nightly Notification Maintenance run (Admin Tasks > Manage Scheduled Tasks > Notification Schedule).
These two notifications are shown below with their corresponding managed property that the administrator will need to set up as follows:
| Notification | Managed Property | ||||
|---|---|---|---|---|---|
| Certification is about to expire |
CertificationExpirationDays – The date the student gets the notification is calculated by taking the Certification Expires in Days field (entered on the Curriculum tab as shown earlier in this document) and subtracts the number of days in this managed property. For example:
|
||||
| Curriculum is about to expire |
CurriculumAccessDays - The date the student gets the notification is calculated by taking the Student Must Complete in (days) field (entered on the Curriculum Tab as shown earlier in this document) and subtracts the number of days in this Managed Property. This is only sent out if the curriculum is not yet completed. For example:
Once he or she reaches the 90 days, he or she will no longer have access to the curriculum. |
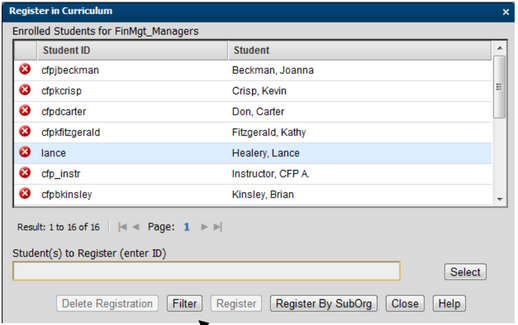
Anyone who has permission to register students can do so here.
|
|
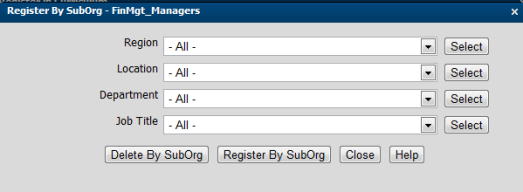
|
When registering by SubOrg, select one or more values for each Sub-Org and then select Register by Sub-Org or Delete by SubOrg. Delete by SubOrg will delete that group of students and essentially un-register them. |
|
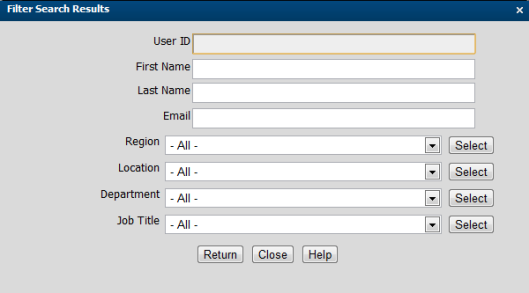
The Filter button will allow you to drill down even further by selecting a particular user by entering in one of 4 fields as well as any SubOrg value. For instance, you might want to find those with the first name of George. This feature helps you find people more quickly. |
|
Anyone who has permission to register students can do so here.
|
|
|
|
This table shows various scenarios you might have in auto-enrolling courses. This assumes you have:
Enabled the managed property AutoEnrollAssignedCurriculum
You have set up a rule in the Assign Curriculum area.
As described above, three very important settings come into play when auto-enrolling curriculums. The managed property settings are site wide so they affect all organizations and can only be turned on or off by your global administrator.
|
Scenario |
Auto Enrollment for Matching Sub-Orgs Check Box |
Managed Property IgnoreSubOrgRestrictionsForCurriculumsInCatalog |
|
|---|---|---|---|
|
To auto enroll users in a particular sub-org and not show it in the catalog for anyone to see |
OFF |
YES |
NO |
|
To auto enroll users in a particular sub-org, but also allow anyone else to see it in their catalog to enroll in if they want |
ON |
YES |
YES |
|
To only show the curriculum to a particular set of users in their catalog but allow them to enroll themselves |
ON |
NO |
NO |
|
|
Auto enrollment does not occur if a curriculum is inactive. |
|
Access using Right-Mouse Click
|
Select the Help button from within each topic of the curriculum for context-sensitive information.
Support | About ELB Learning
© ELB Learning 2022
 . Doing so removes all curriculum history for this student unless they have already completed some of the courses in the curriculum. The history for just those courses will remain.